启动器ServerBootstrap
继续上次的例子,上次已经创建了bossGroup和workerGroup,接下去就是创建启动器了。我们先看看这个结构图:

可以看到他的父类其实和他基本平分一般属性的设置。其实构造方法没做什么,只是初始化了一些属性和选项的集合和ServerBootstrapConfig实例。
然后设置两个group就把上图的两个Group设置了一下:
bootstrap.group(bossGroup, workerGroup)
这个channel(NioServerSocketChannel.class)就有讲究了,一看传的是个Class对象,应该能想到要反射了。看源码:
        public B channel(Class<? extends C> channelClass) {
            return channelFactory(new ReflectiveChannelFactory<C>(
                    ObjectUtil.checkNotNull(channelClass, "channelClass")
            ));
        }
有创建反射通道工厂new ReflectiveChannelFactory,就是通过反射获得无参构造函数this.constructor,当调用newChannel()的时候就可以创建对象了,看下ReflectiveChannelFactory这个类:
    public class ReflectiveChannelFactory<T extends Channel> implements ChannelFactory<T> {
    //取得构造函数后面直接创建实例
        private final Constructor<? extends T> constructor;

        public ReflectiveChannelFactory(Class<? extends T> clazz) {
            ObjectUtil.checkNotNull(clazz, "clazz");
            try {
                this.constructor = clazz.getConstructor();//无参构造函数
            } catch (NoSuchMethodException e) {
                throw new IllegalArgumentException("Class " + StringUtil.simpleClassName(clazz) +
                        " does not have a public non-arg constructor", e);
            }
        }

        @Override
        public T newChannel() {
            try {
                return constructor.newInstance();
            } catch (Throwable t) {
                throw new ChannelException("Unable to create Channel from class " + constructor.getDeclaringClass(), t);
            }
        }

        @Override
        public String toString() {
            return StringUtil.simpleClassName(ReflectiveChannelFactory.class) +
                    '(' + StringUtil.simpleClassName(constructor.getDeclaringClass()) + ".class)";
        }
    }
一目了然了,继续channelFactory方法,就是设置通道工厂,返回自身,继续链式调用:
        public B channelFactory(io.netty.channel.ChannelFactory<? extends C> channelFactory) {
            return channelFactory((ChannelFactory<C>) channelFactory);
        }
         public B channelFactory(ChannelFactory<? extends C> channelFactory) {
            ObjectUtil.checkNotNull(channelFactory, "channelFactory");
            if (this.channelFactory != null) {
                throw new IllegalStateException("channelFactory set already");
            }

            this.channelFactory = channelFactory;
            return self();
        }
然后我们继续childHandler(ChannelHandler childHandler) ,其实也就设置childHandler ,这个时候设置的其实就是通道的初始化ChannelInitializer:
        public ServerBootstrap childHandler(ChannelHandler childHandler) {
            this.childHandler = ObjectUtil.checkNotNull(childHandler, "childHandler");
            return this;
        }
关键的bind
我先来个图吧,可以先看下关键的流程,有个大概,然后下面慢慢分析:

关键的方法来了ChannelFuture cf = bootstrap.bind(8888).sync();:
        public ChannelFuture bind(int inetPort) {
            return bind(new InetSocketAddress(inetPort));
        }
        public ChannelFuture bind(SocketAddress localAddress) {
            validate();
            return doBind(ObjectUtil.checkNotNull(localAddress, "localAddress"));
        }
doBind
这里做了好多事啊,我们慢慢分析:
     private ChannelFuture doBind(final SocketAddress localAddress) {
            final ChannelFuture regFuture = initAndRegister();//通道的创建和初始化initAndRegister
            final Channel channel = regFuture.channel();
            if (regFuture.cause() != null) {
                return regFuture;
            }

            if (regFuture.isDone()) {
                // At this point we know that the registration was complete and successful.
                ChannelPromise promise = channel.newPromise();
                doBind0(regFuture, channel, localAddress, promise);
                return promise;
            } else {
                // Registration future is almost always fulfilled already, but just in case it's not.
                final PendingRegistrationPromise promise = new PendingRegistrationPromise(channel);
                regFuture.addListener(new ChannelFutureListener() {
                    @Override
                    public void operationComplete(ChannelFuture future) throws Exception {
                        Throwable cause = future.cause();
                        if (cause != null) {
                            // Registration on the EventLoop failed so fail the ChannelPromise directly to not cause an
                            // IllegalStateException once we try to access the EventLoop of the Channel.
                            promise.setFailure(cause);
                        } else {
                            // Registration was successful, so set the correct executor to use.
                            // See https://github.com/netty/netty/issues/2586
                            promise.registered();

                            doBind0(regFuture, channel, localAddress, promise);
                        }
                    }
                });
                return promise;
            }
        }
通道的创建和初始化initAndRegister
        final ChannelFuture initAndRegister() {
            Channel channel = null;
            try {
                channel = channelFactory.newChannel();//创建通道
                init(channel);//初始化通道
            } catch (Throwable t) {
    			...
            }

            ChannelFuture regFuture = config().group().register(channel);
            if (regFuture.cause() != null) {
                if (channel.isRegistered()) {
                    channel.close();
                } else {
                    channel.unsafe().closeForcibly();
                }
            }


            return regFuture;
        }
这里的channelFactory.newChannel();就是创建上面讲的设置channel(NioServerSocketChannel.class)的NioServerSocketChannel实例:

实例化NioServerSocketChannel
看看这个的简单结构,黄色的框里的都是会调用到构造函数的:
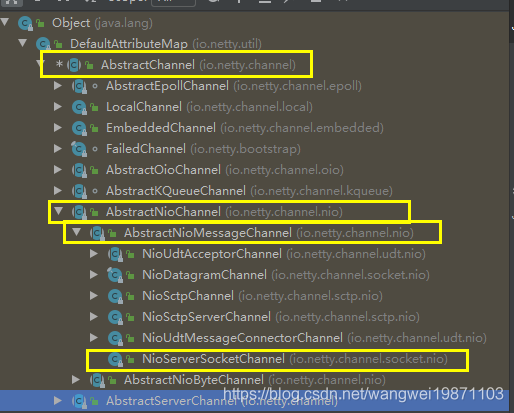
我们来看看NioServerSocketChannel的实例化:
        public NioServerSocketChannel() {
            this(newSocket(DEFAULT_SELECTOR_PROVIDER));
        }
      private static ServerSocketChannel newSocket(SelectorProvider provider) {
            try {
                return provider.openServerSocketChannel();
            } catch (IOException e) {
                throw new ChannelException(
                        "Failed to open a server socket.", e);
            }
        }
newSocket返回的是默认的ServerSocketChannelImpl,这个是NIO里的。
然后继续构造函数,可以看到 SelectionKey.OP_ACCEPT,这个不就是NIO里的请求连接么:
        public NioServerSocketChannel(ServerSocketChannel channel) {
            super(null, channel, SelectionKey.OP_ACCEPT);
            config = new NioServerSocketChannelConfig(this, javaChannel().socket());
        }
这里设置了一些配置信息,通道NioServerSocketChannel和一个ServerSocket实例。
super的:
        protected AbstractNioMessageChannel(Channel parent, SelectableChannel ch, int readInterestOp) {
            super(parent, ch, readInterestOp);
        }
super的:
     protected AbstractNioChannel(Channel parent, SelectableChannel ch, int readInterestOp) {
            super(parent);
            this.ch = ch;//设置ServerSocketChannel实例ServerSocketChannelImpl
            this.readInterestOp = readInterestOp;//设置事件OP_ACCEPT
            try {
                ch.configureBlocking(false);//设置非阻塞
            } catch (IOException e) {
             ...
            }
        }
这里设置了通道NioServerSocketChannel和感兴趣的事件readInterestOp。
最后super的:
        protected AbstractChannel(Channel parent) {
            this.parent = parent;
            id = newId();//id
            unsafe = newUnsafe();//创建NioMessageUnsafe,一些底层的操作都是这个来完成的
            pipeline = newChannelPipeline();//管道
        }
看到最后一个里面有pipeline = newChannelPipeline();,创建了ChannelPipeline类型的实例,实际类型是DefaultChannelPipeline,还创建了id 类型是DefaultChannelId实现了ChannelId,也就是可以生成唯一标识符asLongText()的实例。
DefaultChannelPipeline
这里就稍微介绍下这个吧,后面还会重点介绍ChannelPipeline,看这个的构造函数:
        protected DefaultChannelPipeline(Channel channel) {
            this.channel = ObjectUtil.checkNotNull(channel, "channel");
            succeededFuture = new SucceededChannelFuture(channel, null);
            voidPromise =  new VoidChannelPromise(channel, true);

            tail = new TailContext(this);
            head = new HeadContext(this);

            head.next = tail;
            tail.prev = head;
        }
可以看到双向链表的结构,头尾都是初始化好的:

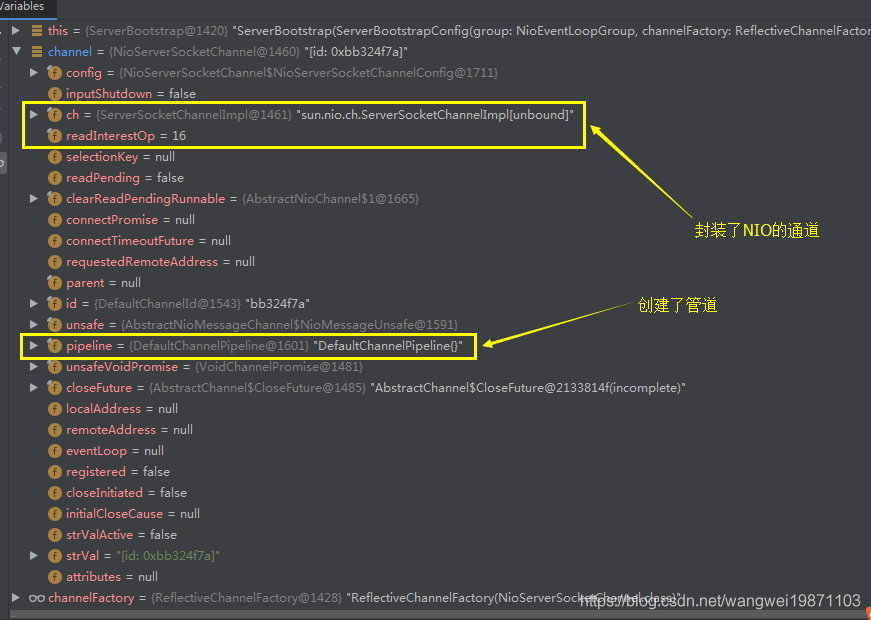
我们可以看看创建完的NioServerSocketChannel:
初始化通道init(channel)
     @Override
        void init(Channel channel) {
            setChannelOptions(channel, options0().entrySet().toArray(EMPTY_OPTION_ARRAY), logger);
            setAttributes(channel, attrs0().entrySet().toArray(EMPTY_ATTRIBUTE_ARRAY));

            ChannelPipeline p = channel.pipeline();

            final EventLoopGroup currentChildGroup = childGroup;
            final ChannelHandler currentChildHandler = childHandler;
            final Entry<ChannelOption<?>, Object>[] currentChildOptions =
                    childOptions.entrySet().toArray(EMPTY_OPTION_ARRAY);
            final Entry<AttributeKey<?>, Object>[] currentChildAttrs = childAttrs.entrySet().toArray(EMPTY_ATTRIBUTE_ARRAY);

            p.addLast(new ChannelInitializer<Channel>() {
                @Override
                public void initChannel(final Channel ch) {
                    final ChannelPipeline pipeline = ch.pipeline();
                    ChannelHandler handler = config.handler();
                    if (handler != null) {
                        pipeline.addLast(handler);
                    }

                    ch.eventLoop().execute(new Runnable() {
                        @Override
                        public void run() {
                            pipeline.addLast(new ServerBootstrapAcceptor(
                                    ch, currentChildGroup, currentChildHandler, currentChildOptions, currentChildAttrs));
                        }
                    });
                }
            });
        }
关键点addLast
前面设置一堆属性,最后的在管道的倒数第二个位置上加了一个ChannelInitializer,我为什么说addLast是导数第二个位置,而不是加到最后呢,来看看源码:
        @Override
        public final ChannelPipeline addLast(ChannelHandler... handlers) {
            return addLast(null, handlers);
        }
            @Override
        public final ChannelPipeline addLast(EventExecutorGroup executor, ChannelHandler... handlers) {
            ObjectUtil.checkNotNull(handlers, "handlers");

            for (ChannelHandler h: handlers) {
                if (h == null) {
                    break;
                }
                addLast(executor, null, h);
            }

            return this;
        }
具体的还在这里:
      public final ChannelPipeline addLast(EventExecutorGroup group, String name, ChannelHandler handler) {
            final AbstractChannelHandlerContext newCtx;
            synchronized (this) {
                checkMultiplicity(handler);

                newCtx = newContext(group, filterName(name, handler), handler);

                addLast0(newCtx);

                if (!registered) {//只会执行一次
                    newCtx.setAddPending();
                    callHandlerCallbackLater(newCtx, true);//暂时放入一个单链表中后面执行
                    return this;
                }

                EventExecutor executor = newCtx.executor();
                if (!executor.inEventLoop()) {
                    callHandlerAddedInEventLoop(newCtx, executor);
                    return this;
                }
            }
            callHandlerAdded0(newCtx);
            return this;
        }
创建ChannelHandlerContext实例newContext
会创建DefaultChannelHandlerContext实例,是ChannelHandlerContext的子类,而且会把管道和handler传进去,所以为什么ChannelHandlerContext可以获得管道和处理器了,具体的细节暂时不讲,后面一起讲:
        private AbstractChannelHandlerContext newContext(EventExecutorGroup group, String name, ChannelHandler handler) {
            return new DefaultChannelHandlerContext(this, childExecutor(group), name, handler);
        }

不是增加到尾部的addLast0
我们可以看到,这个就是把前面创建的ChannelHandlerContext加到里面去了,可见处理器被通道处理器上下文给包裹了,我们看他是怎么添加的,他只是把新的结点插入到导数第二个位置:
        private void addLast0(AbstractChannelHandlerContext newCtx) {
            AbstractChannelHandlerContext prev = tail.prev;
            newCtx.prev = prev;
            newCtx.next = tail;
            prev.next = newCtx;
            tail.prev = newCtx;
        }
图示:

之后因为是第一次注册,所以就会返回了:
    if (!registered) {
                    newCtx.setAddPending();
                    callHandlerCallbackLater(newCtx, true);//暂时放入一个单链表中后面执行
                    return this;
                }
我们再看看初始化的处理器做了什么:
     public void initChannel(final Channel ch) {
                    final ChannelPipeline pipeline = ch.pipeline();
                    ChannelHandler handler = config.handler();
                    if (handler != null) {//如果有设置handler ,把handler 也加上
                        pipeline.addLast(handler);
                    }

                    ch.eventLoop().execute(new Runnable() {
                        @Override
                        public void run() {
                            pipeline.addLast(new ServerBootstrapAcceptor(
                                    ch, currentChildGroup, currentChildHandler, currentChildOptions, currentChildAttrs));
                        }
                    });
                }
主要就是开启一个循环把ServerBootstrapAcceptor加到了通道里去了,这个也就是我们常说的连接接收器Acceptor。那什么时候这段代码会执行呢,后面我们会讲,这里先不展开。接下去的东西后面讲吧,跟了源码太多,就太长了,不跟源码讲的太粗粒度又没啥意思,还是平衡下吧。
好了,今天就到这里了,希望对学习理解有帮助,大神看见勿喷,仅为自己的学习理解,能力有限,请多包涵。
Java 面试宝典是大明哥全力打造的 Java 精品面试题,它是一份靠谱、强大、详细、经典的 Java 后端面试宝典。它不仅仅只是一道道面试题,而是一套完整的 Java 知识体系,一套你 Java 知识点的扫盲贴。
它的内容包括:
- 大厂真题:Java 面试宝典里面的题目都是最近几年的高频的大厂面试真题。
- 原创内容:Java 面试宝典内容全部都是大明哥原创,内容全面且通俗易懂,回答部分可以直接作为面试回答内容。
- 持续更新:一次购买,永久有效。大明哥会持续更新 3+ 年,累计更新 1000+,宝典会不断迭代更新,保证最新、最全面。
- 覆盖全面:本宝典累计更新 1000+,从 Java 入门到 Java 架构的高频面试题,实现 360° 全覆盖。
- 不止面试:内容包含面试题解析、内容详解、知识扩展,它不仅仅只是一份面试题,更是一套完整的 Java 知识体系。
- 宝典详情:https://www.yuque.com/chenssy/sike-java/xvlo920axlp7sf4k
- 宝典总览:https://www.yuque.com/chenssy/sike-java/yogsehzntzgp4ly1
- 宝典进展:https://www.yuque.com/chenssy/sike-java/en9ned7loo47z5aw
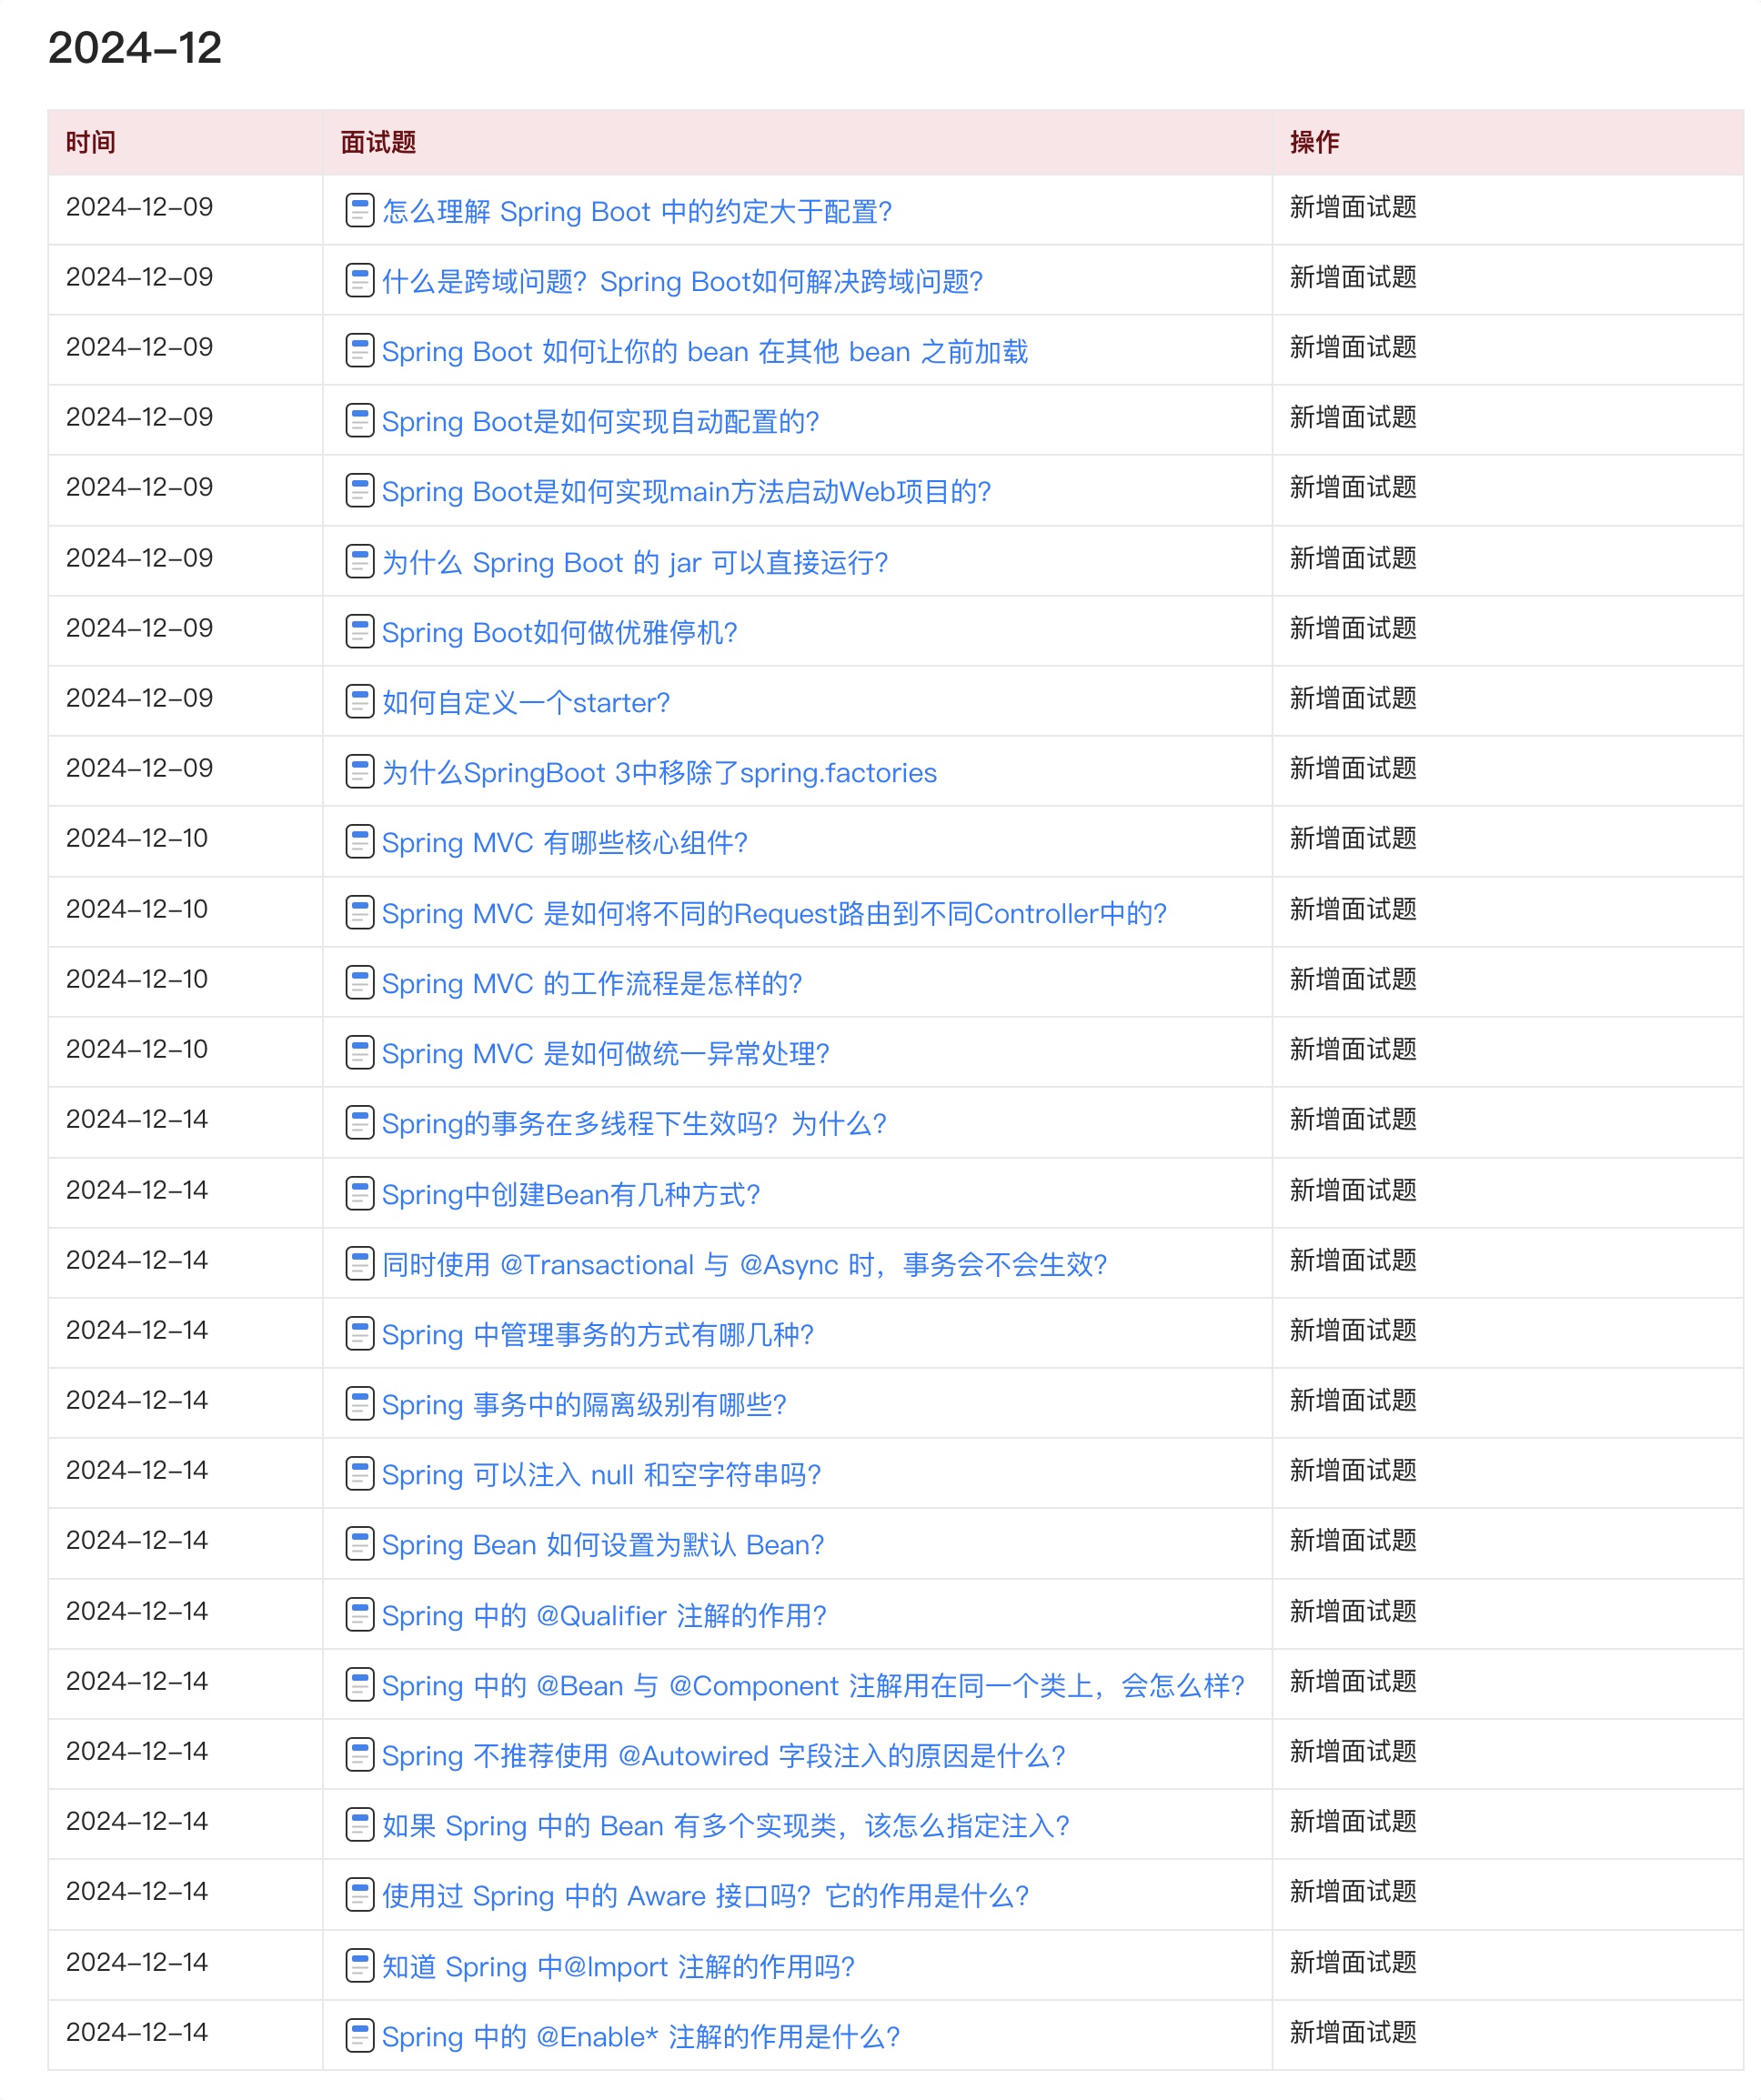
目前 Java 面试宝典累计更新 400+ 道,总字数 42w+。大明哥还在持续更新中,下图是大明哥在 2024-12 月份的更新情况:
想了解详情的小伙伴,扫描下面二维码加大明哥微信【daming091】咨询

同时,大明哥也整理一套目前市面最常见的热点面试题。微信搜[大明哥聊 Java]或扫描下方二维码关注大明哥的原创公众号[大明哥聊 Java] ,回复【面试题】 即可免费领取。